
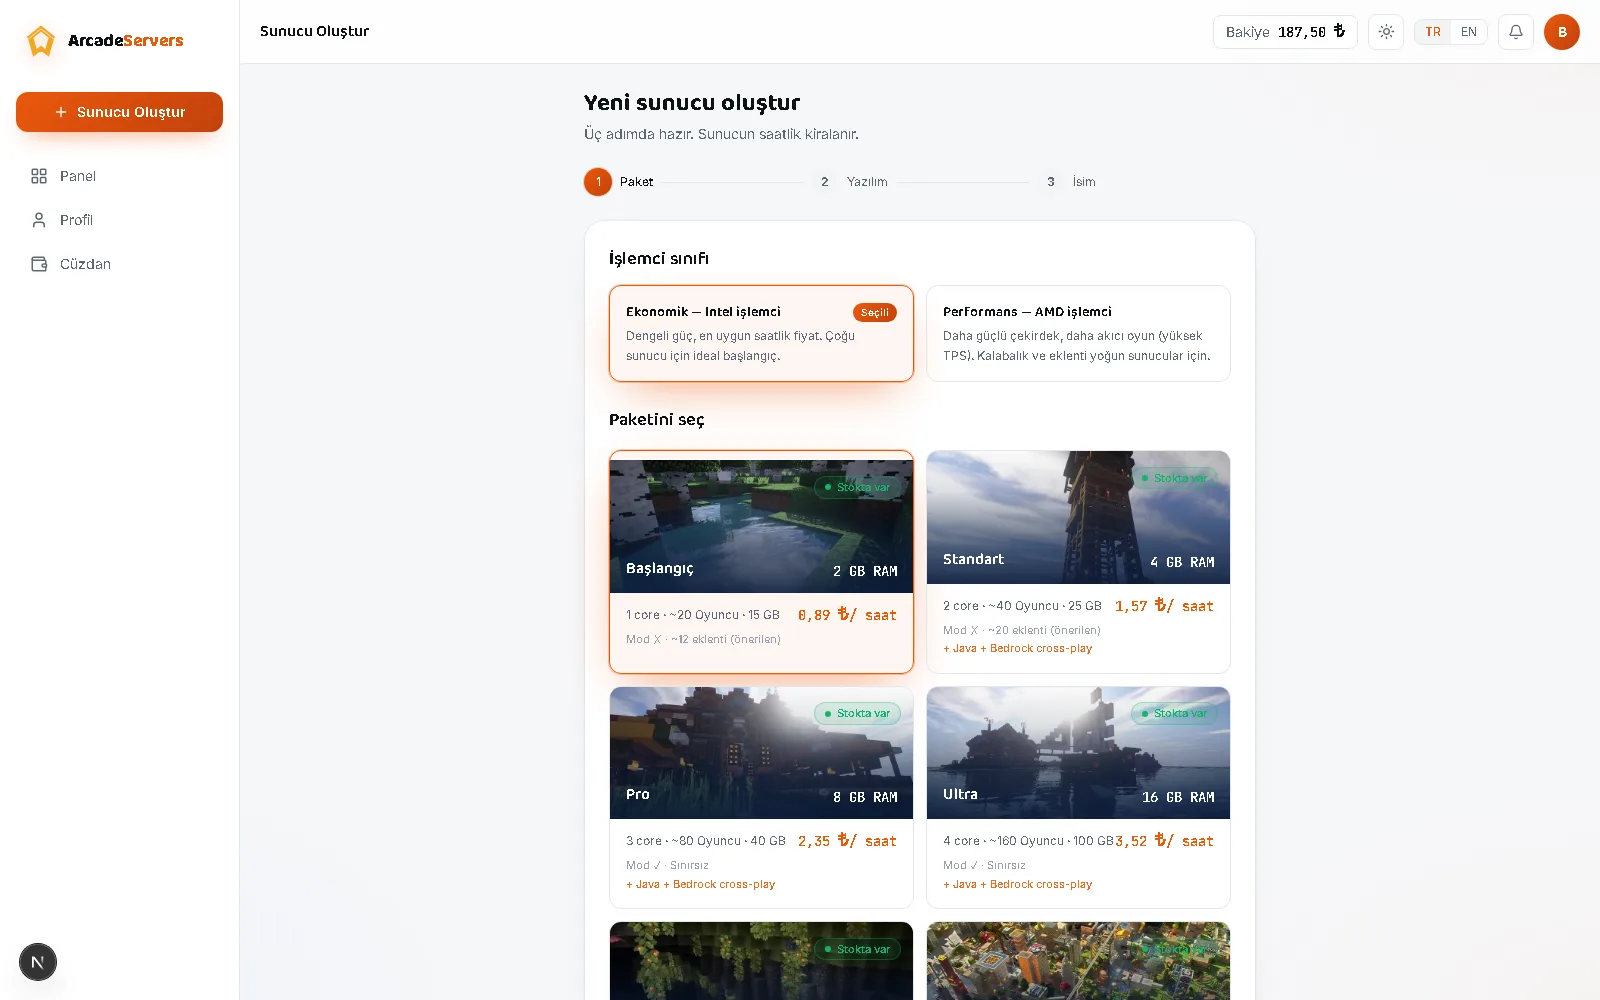
The hard part of opening your first server isn't the technical setup — it's knowing what each option does. This guide walks through the steps of the setup wizard, tells you what to base each decision on, and covers what to do in the first ten minutes after your server comes up.
Answer two questions before you start
Almost every choice in the wizard follows from two answers: how many people will play, and will you use plugins or mods?
Player count drives your package; plugins versus mods drives your server software. If you're unsure about either, starting small is the cheapest path — you can stop the server later and resize it from the Resources section, and your world stays exactly as it was. For detail, see the guide on how much RAM you need for how many players.
Step 1 — Choose your package
When you press New Server in the panel, the first screen is package selection. Ready-made packages are ordered by RAM, and each card lists the allocated cores, NVMe disk space and advised player count.
Three packages are currently on sale: Starter (2 GB), Standard (4 GB) and Pro (8 GB). Larger tiers appear as "coming soon" and can't be selected. If none of the presets fit, Custom Configuration lets you set RAM, cores and disk individually.
Keep two thresholds in mind: Bedrock cross-play (phone and Windows 10/11 players) needs at least 4 GB, and mod or modpack installs need at least 8 GB. If you'll only use plugins, 2 GB is enough.
The player counts on the cards are guidance, not a hard gate. You can set a higher number; the panel simply reminds you performance may be affected and leaves the decision to you.
Step 2 — Choose your server software
The second step decides which software runs your server. Nine options are offered, in two families:
- Plugin family — Paper, Purpur, Spigot, CraftBukkit. You can install plugins; players connect with standard Minecraft and install nothing.
- Mod family — Fabric, Quilt, Forge, NeoForge. You can install mods and modpacks, but every player must install the same mod set locally.
- Vanilla — the original server, which accepts no additions.
If you're undecided, Paper is the safe default: it runs plugins, includes performance improvements, and the Bedrock bridge can only be enabled on this family. To compare, see the guide on which server software to choose.
You can change software later, too. And when you switch families, all content from the old family is saved into a profile — return to the same software and your worlds and plugins come back as they were. So this step isn't a one-way door.
Step 3 — Version and world
The version list is fetched live and the latest stable release is preselected. If you're planning around a specific plugin or modpack, pick the version it requires — version mismatch is the number one reason a server won't start.
For the world you can start empty, or upload an existing world later. Uploading after setup works fine too, so there's no need to get stuck here.
Step 4 — Setup and first connection
After you confirm, setup typically takes a few minutes. The panel shows progress live, and once your server is ready its connection address appears in the list and copies with one click.
Open Minecraft, go to Multiplayer → Add Server and paste the address. Java players don't need to type a port — the address alone is enough. There's no port forwarding, no static IP and no need to leave your own PC running: the server lives in the cloud.
The first ten minutes
On the first login most people do these three things:
- Make yourself an operator. Run
op YourUsernamefrom the panel's live console and you can use admin commands in game. The Players section has an "Make OP" button that does the same. - Whitelist your friends. If you want the server limited to people you know, the whitelist is the simplest route, managed from the Players section.
- Review world and game settings. Difficulty, game mode, PvP, spawn protection radius and the server description (MOTD) can all be changed from the Settings section without editing a single file.
Design the world yourself
The Worlds section is one of the most useful places once the server is up. Creating a new world there, you can enter a seed, pick a world type (Normal, Superflat, Amplified, Large Biomes) and decide whether structures generate.
The same screen offers difficulty, game mode, hardcore, PvP and monster spawning, plus game rules you can toggle: keep inventory on death, mob griefing, daylight cycle, fire spread, death messages and fall damage among them.
You can keep several worlds, activate one and leave the others aside. To upload an outside world, the zip only needs to contain level.dat.
How billing works
The server runs hourly and you're only charged for the time it stays up. Stop the server and hourly billing stops too.
On new servers the idle sleep setting is on by default: if the server sits with no players for 15 minutes it puts itself to sleep, so your balance isn't spent while nobody is playing. When someone wants in you wake it with one click; being ready can take a few minutes. If you'd rather it stayed up, you can switch this off in Settings — your preference is remembered.
Common problems
- Address not found — make sure you copied the whole address. Use copy-paste rather than typing what the panel shows.
- Version mismatch — your Minecraft client and the server must be on the same version. You can switch client versions from the launcher.
- Server starts then stops — usually an incompatible plugin or mod. The last lines of the console name the file causing it.
- Server shuts down when nobody is on — that isn't a fault; it's the idle-sleep setting described above.
- A friend can't join but I can — the whitelist may be on. Add them from the Players section.
Your server is up and running — next comes installing plugins, inviting friends and protecting your world. Continue with the plugin installation guide, read how the hourly model works, or compare packages.